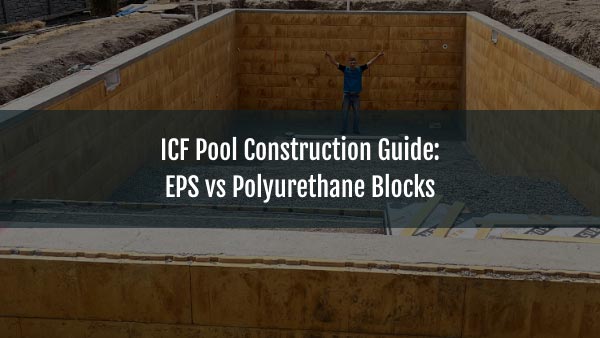
Building your own swimming pool may seem like the perfect DIY project—saving money while creating a backyard oasis. ICF (Insulated Concrete Forms) pools, made from expanded polystyrene filled with concrete, are gaining popularity due to their energy efficiency and strength. But how realistic is this for a non-professional?
Building such a pool as a non-professional can be compared to sewing a classic men’s suit (jacket, pants, vest) by someone who has never held a needle and thread or scissors in their hands and has only seen work on a sewing machine in videos. What kind of result do you think one can expect?
Nevertheless, we will examine all the stages in detail from start to finish and evaluate whether it’s worth the effort. This guide assumes basic tool-handling skills, but remember: Pools require adherence to structural integrity, safety, and local building codes—if you’re not sure, consult professionals.
This is exactly the reality many homeowners face when considering ICF block pool construction as a DIY project. While the technology itself is proven and widely used by professionals, the process demands precision, sequencing, and experience that go far beyond typical home improvement tasks.

Stage 1: Excavating the Foundation Pit
The foundation begins with excavating the pit, which determines the pool’s shape and depth. For a standard 20×40-foot pool (approximately 4–6 feet deep), you will need to dig an additional 1–2 feet around the edges for working space and drainage.
What you’ll need:
- Backhoe or mini-excavator (rental $300–500 per day; manual digging is impractical for large pits).
- Measuring tools such as tape measures, levels, and stakes/string for marking.
- Soil testing kit or services to check stability (avoid rocky or unstable soils to prevent shifts).
- Permits from local authorities, as regulations vary by area.
Process: Mark the outline, dig the pit to depth (sloping walls for safety), and remove the soil. Compact the bottom with a vibratory plate compactor (rental $100–200). Lay a gravel base (4–6 inches) for drainage, then a vapor barrier sheet. This stage takes 1–3 days but requires heavy equipment—DIY builders without experience risk uneven pits or collapses.Note: Mistakes made during excavation are extremely difficult and expensive to correct later. This is one of the main reasons many homeowners choose to work with an experienced ICF swimming pool builder Wellington FL, who understands soil behavior, drainage requirements, and structural preparation before any concrete is poured.

Stage 2: Pouring the Base (Bottom) of the Pool
The base is the pool’s foundation, usually a 4–6 inch concrete slab. The surface must be level to support the weight of the water (up to 50,000 gallons!).
What you’ll need:
- Concrete mix (self-leveling or standard; 5,000 PSI strength for pools).
- Rebar (½-inch steel rods) for reinforcement—order, deliver, and cut with bolt cutters or an angle grinder.
- Wire mesh or fiber additives for additional strength.
- Forms (wooden boards) to contain the pour.
- Materials: Gravel, sand, specific-grade cement, water.
- Equipment: Concrete mixer ($1,000 + delivery), vibrators (rental $50), trowels, and floats for leveling.
For the base of the specified pool size, you’ll need about 520 ft³ of concrete and approximately 2,530 ft of rebar.
Process: Lay and tie the rebar grid (6–12 inch spacing) with wire, elevating it on supports. Mix/pour concrete evenly, vibrate to remove air bubbles, level with a screed board, and smooth with a trowel. Keep moist for 7–28 days (cover with plastic sheeting). Cutting rebar involves measuring, marking, and safe handling—gloves and safety glasses are required. This stage demands precision.
Note: It is also possible to create a monolithic pool shell. In this case, the pool bottom and walls are poured with concrete simultaneously. ICF blocks are installed in a special way, which requires experience and professionalism.

Stage 3: Installing ICF Blocks
ICF blocks (EPS or polyurethane) form the walls. They are lightweight (10–20 pounds each) and simply connect to each other.
What you’ll need:
- ICF blocks (cost $5–10 each; calculate based on pool size).
- Rebar and wire.
- Bracing (wooden/metal) to keep forms straight during the pour.
- Level, plumb bob, and saw for cutting blocks.
Process: Lay blocks on the hardened base, starting from corners. Insert horizontal/vertical rebar according to standards (every 12–24 inches, per code). Follow manufacturer instructions for curves/steps. Brace the exterior to prevent bulging. For a standard pool, this takes 1–2 days but requires accuracy—misaligned walls mean structural problems.
Rebar needed for block installation is about 1,870 ft.

Stage 3.5: Laying Pipes and Plumbing
Before pouring concrete into the walls, install plumbing for filtration, drainage, returns, and jets. This ensures reliable attachment of all equipment.
What you’ll need:
- PVC pipes (Schedule 40, 1.5–2 inch diameter for main lines).
- Fittings (elbows, tees, valves), skimmers, main drain, and return pipes.
- Pipe glue, primer, and hacksaw.
- Trenching tools or auger for underground lines.
- Equipment: Level, tape measure, compressor and pressure gauge ($50–100) to check pipes with compressed air for leaks before pouring.
Process: Plan the layout—main drain at the deepest point, skimmers on the surface, return pipes for circulation. Trench from the pool to the equipment pad (filter, pump—20–50 feet away). Cut and glue pipes, positioning them through ICF blocks (with pre-cut holes). Secure with ties to rebar. Test for leaks with air. This adds 1–3 days; errors such as poor gluing will lead to expensive future repairs.
Stage 4: Pouring Concrete into ICF Blocks
For pools, use high-strength concrete with low slump (4,000–5,000 PSI) to minimize shrinkage.
What you’ll need:
- Concrete (preferably ready-mix for large volumes). For the specified pool size, about 400 ft³ is needed.
- Concrete pump (rental from $1,500) for even filling.
- Vibrators for consolidating concrete.
- Other equipment: Buckets, chutes for directing the pour, and protective gear.
Process: Fill concrete in stages (lifts of 60–120 cm) to avoid form blowouts. Vibrate thoroughly. This is extremely important—poor pouring leads to voids or failures.

Stage 5: Installing the Cladding
Complete the work by installing a thick reinforced PVC membrane, for example, Cefil 60 mil pool liner, for waterproofing.
What you’ll need:
- PVC membrane rolls (up to 4 pieces). Strip cutting is done on-site.
- Welding tools (heat gun), special roller for smoothing seams, brush for cleaning the gun.
- Geotextile underlay.
- Cutter (scissors), awl for checking seam quality.
- Liquid PVC.
Process: Lay underlay, cut membrane to pool shape, and weld seams. Install fittings, skimmers, lighting fixtures. Takes 1–2 weeks for professionals. Without practical experience, mistakes are unavoidable, leading to expensive consequences.
Also consider installing coping stone or surrounding decking and landscaping.
Important: The article does not cover the installation and connection of equipment: pumps, filters, heaters, lighting. These should be handled exclusively by professionals.

Have Questions?
Talk to our specialist! Just fill out the form, and we’ll give you a call!
Is It Recommended to Do This Yourself?
Although it is possible with the necessary knowledge and tools, building ICF pools yourself is not suitable for everyone. You will save 30–50% on labor ($20,000–$40,000), but total costs (materials from $30,000–$50,000) and time (2–3 months or more) add up to a significant amount. What professionals complete in 3–4 weeks will take you months. Mistakes such as uneven ground excavation, poor concrete pouring, or errors during PVC membrane installation lead to expensive corrections or safety risks. If you’re not familiar with construction, hire professionals like SAKKO POOL to avoid regrets—peace of mind is more important than illusory savings.
FAQ: Building an ICF Pool Yourself
Other articles on this topic


Common Pool Restoration Mistakes and How Thick PVC Membranes Fix Them in Florida Homes

Why a 60-Mil PVC Pool Liner Outperforms Thin Pool Liners in Sunny Climates
Common Pool Liner Problems: Insights from Reddit Communities
ICF Blocks Compared: Stronghold vs. BuildBlock – Which One Wins?
Common Pool Liner Mistakes to Avoid: Lessons from Real Renovation Projects
Insulated Swimming Pool Benefits: Energy Efficiency and Year-Round Use